Recording video
- Record video
- To get started
- Select a video device
- Select an audio device
- Video file options
- Change the video file location
- Set video file base name
- Select or deselect videos for recording
- Record your videos
- Mute audio in preview
- Options
- Change video order in preview
- Show frame rate, resolution and format
- Refresh the preview
- See which preview image comes from which camera
- Show or hide recording properties
- Save the camera settings
- Pan, Tilt, Zoom control with IP cameras
- Enter a default user name and password of IP cameras
- Use commands
- Picture by Picture resolution
Record video
Main topics
- To get started
- Select a video device
- Select an audio device
- Video file options
- Record your videos
- Options
- Save the camera settings
- Use commands to control video recording with other software.
- Picture by Picture resolution
To get started
Main steps
To start working with MediaRecorder involves the following steps:
- Connect all devices and, if applicable, switch them on.
- If you have a hardware key - Insert it into a USB port of the computer.
- Start MediaRecorder. The main window now opens. The first time it opens, the preview window is black. That is because you still have to select the cameras. Proceed with the next steps to do so.
- Click Video Settings to select the cameras, microphones and, optionally, the output. See:
Select a video device
Select an audio device
Video file options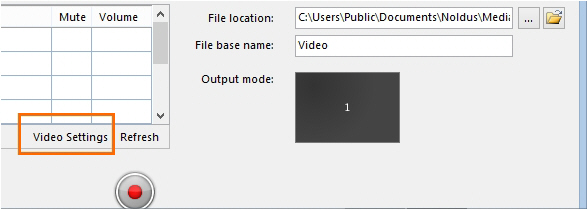
- Record your videos


Select a video device
Aim
To select the cameras for recording.
Prerequisites
- Your devices are connected to the computer with MediaRecorder, and, if applicable, switched on.
- MediaRecorder is open.
- You opened the Video Settings window. To do so, choose File > Video Settings, or click Video Settings in the main window.

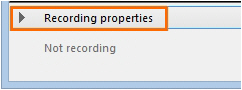
tip If the Video Settings button is not visible, the recording properties may be closed. Click Recording Properties at the bottom of your window. By default the recording properties are open.
Procedure
In the Video Settings window:
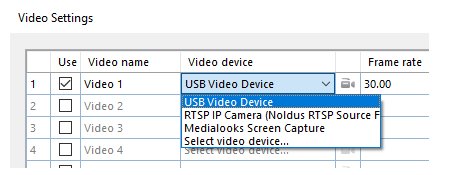
- Select your camera from the Video device list.

IMPORTANT
If you have IP cameras see Set up IP cameras how to set these up and select them in MediaRecorder.
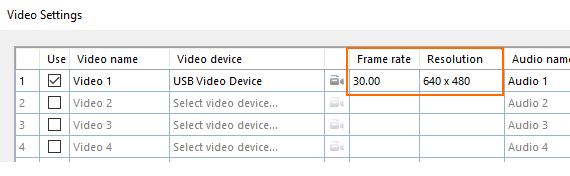
If you use the Screen Capture tool, see Use of the Screen Capture tool on how to select the built-in screen capture device. - Select the preferred frame rate and resolution. The options depend on your type of camera.
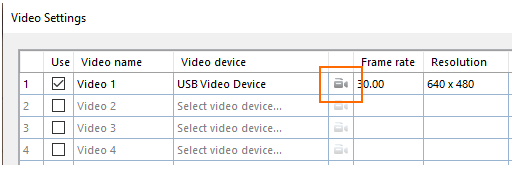
- For advanced camera settings, click the video symbol next to the name of your camera. The available options depend on your camera. For some cameras you can zoom and adjust settings for brightness and contrast.

- Optionally change the names in the Video name column, to, for example, Webcam, or IP camera.
- To record audio as well, continue with Select an audio device
- Optionally adjust Video file options
- When satisfied with the settings click OK to return to the main window and record your videos (see Record your videos)

Note
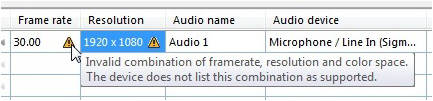
Frame rate and resolution
By default, the optimal combination of frame rate and resolution for the camera is selected. If you increase the frame rate, the maximum resolution available goes down and vice versa. If you select an impossible combination of frame rate and resolution and format, MediaRecorder gives a warning (see below).
Select an audio device
Aim
To select the audio source.
Prerequisites
- Your devices are connected to the computer with MediaRecorder, and, if applicable, switched on.
- MediaRecorder is open.
- You opened the Video Settings window. To do so, choose File > Video Settings, or click Video Settings in the main window.
Procedure
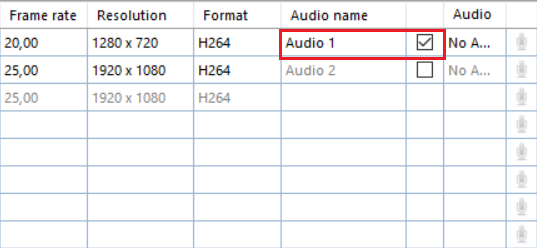
- In the Video Settings window, select the microphones under Audio device. Choose between your computer microphone, a separate microphone, or the audio stream of your camera. Choose No audio if you do not wish to record audio.
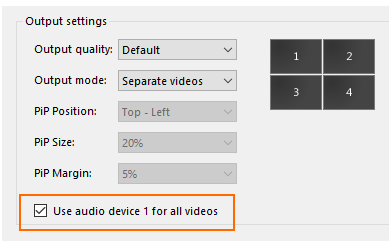
- Optionally record the same audio stream in all videos. To do so, select this checkbox. It means that the device defined as Audio device 1 will supply the audio stream for all your videos.

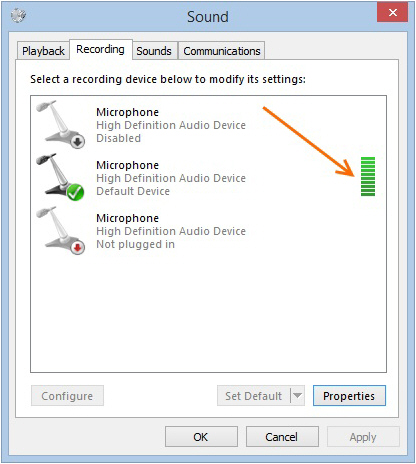
Check that the green bar is maximal when speech level is normal.
Please note that in Picture-in-Picture mode, you may select which audio source to use for all the videos. This may be important if the first video is the screencapture device, which does not record audio. To do so, select this checkbox:
 (For the Picture-in Picture mode, see the Output settings in Video file options).
 - Click the microphone button for Audio settings.
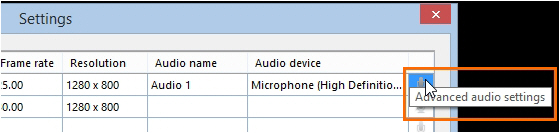
The available options depend on your microphones. Move the sliders to adjust the recording volume.
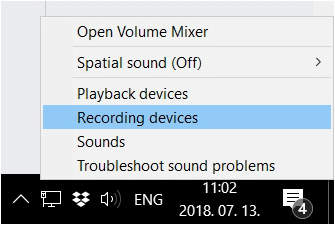
To check the recording volume, right-click the speaker icon in the bottom-right corner of your window and select Recording devices.
- Optionally, change the names in the Audio name column.
- Optionally, adjust the Video file options
- When satisfied with the settings click OK to return to the main window and Record your videos


Note
Audio is needed and has been tested only for cameras that are supported in The Observer XT.
Video file options
Aim
To specify one of the following:
- Format of the recording timer. See Timer format
- Maximum recording time
- Video file output: separate videos, or one video with the images from all the cameras.
See Output settings
Prerequisites
- Your devices are connected to the computer with MediaRecorder, and, if applicable, switched on.
- MediaRecorder is open.
- You opened the Video Settings window. To do so, choose File > Video Settings, or click Video Settings in the main window.
Procedure
Timer format
Select the options from the lists.

The recording timer is present in the lower-left corner of the main window.
Maximum recording time
Select the checkbox and enter the maximum recording time.
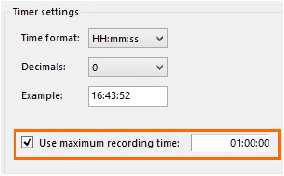
The maximum is 99:99:59 (hr: min: sec). However, see your camera type in the topic Recording devices for the supported maximum recording time.
Output settings
Output Quality - Videos can be recorded in various qualities depending on the use. Videos with a higher compression rate are usually smaller in size, but they take more processing power to create and play, and their quality may be worse compared to those with lower compression rates. If hardware encoding is used to decrease the CPU usage and redirect load to the video card (GPU), it may result in a larger video file.
There are four presets defined, in separate xml files which you can find in C:\ProgramData\Noldus\MediaRecorder\6\EncoderSettings. It is not advised to modify the contents of these files, as they are optimized for the different use cases. For normal use, the default output quality should be used. For EthoVision, DanioVision and the Remote Photo Plethysmography (RPPG) module of FaceReader, special settings are defined.
The special setting for EthoVision is only useful if you record the outputs of four cameras simultaneously. With the default settings, two cameras are recorded on CPU and two on the video card (GPU). This results in differences in file size. By selecting EthoVision as the output quality, all four cameras will be recorded using CPU power.
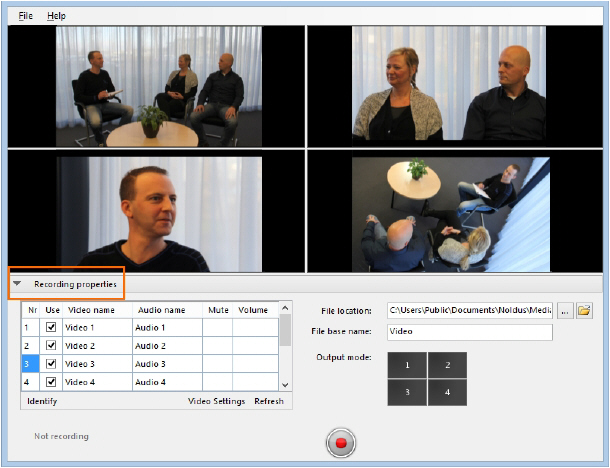
Output mode - If you have selected more than one video source, the following options are available.
- Separate videos — One video file for each camera.
- Picture by Picture — One video file with the images from each camera next or above each other.
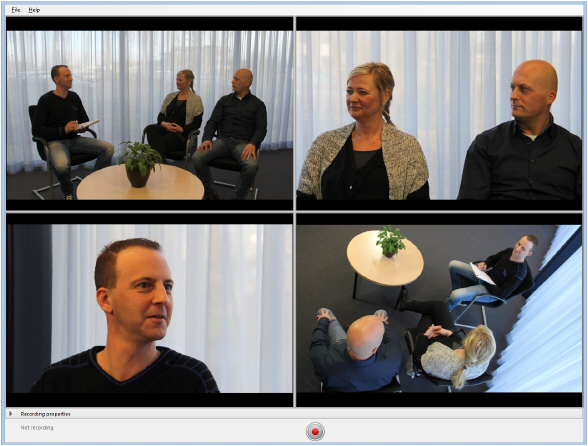
- Picture in Picture — One video file with a large image of the first camera with the images from the other cameras embedded in it.

If you select Picture in Picture the following options become available:
- PiP Position — The position of the embedded images.
- Pip Size — The size of the embedded images. The percentage is based on the width of the first camera image. The aspect ratios of the embedded camera images are maintained.
- Pip Margin — The margin of the embedded images. When the percentage is zero, the embedded images are positioned directly on the edge of the main image. The percentage is based on the width of the first camera image.
Notes
Picture in Picture and Picture by Picture resolution
If possible, choose the same frame rate for all the videos. If you choose different frame rates the videos with the lowest frame rates may flicker and may not be suitable for use in The Observer XT, EthoVision XT, or FaceReader.
Picture by Picture resolution of input videos
The resolution of the resulting video is a sum of the separate videos, with a maximum of 1920 x 1280. If the resulting video exceeds a width of 1920 pixels or a height of 1280 pixels, the video resolution is adjusted proportionally. This requires processor capacity and decreases the quality of the output video. It is better to choose a lower resolution of the individual videos, so that the total resolution does not exceed 1920 x 1280.
See Picture by Picture resolution how the resolution of the resulting video is calculated.
Picture in Picture with portrait format
Please note that if you have multiple videos in portrait format, they may overlap when you use Picture in Picture.
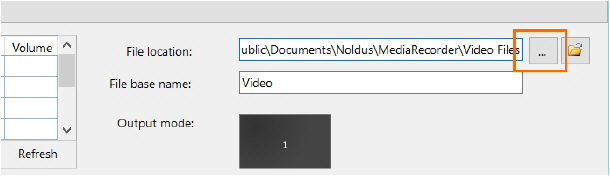
Change the video file location
Aim
To save the videos in another location than the default one.
The default location where MediaRecorder stores its video files is:
D:\Noldus\MediaRecorder\Video Files — If Noldus IT installed your system
C:\Users\Public\Public Documents\Noldus\MediaRecorder\Video Files — In all other cases. It is recommended to set this folder to be located on a separate, fast, large capacity drive.
Prerequisite
You must be able to write in the selected folder and there must be enough file space available (at least 600 Mb per video per hour).
Procedure
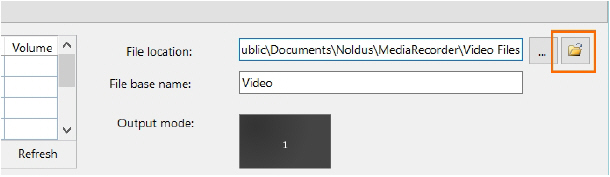
tip Click this button to open the folder with video files in Windows Explorer and play recorded videos.
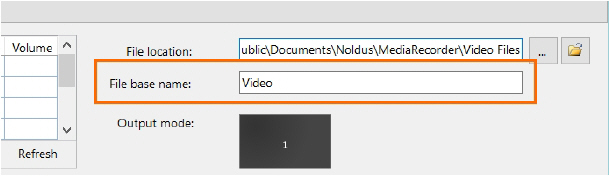
Set video file base name
Aim
To select a word or phrase to start the video file name with.
The video file name consists of the File base name followed by:
- The video input name.
- The date and the time the videos were recorded.
- The number of the video camera.
Example – The File base name is Video, you changed the name of Video 2 to Webcam in the Video Settings window (File > Video Settings), the date is 11 May 2016, the time 10:54:43 and you create 2 videos simultaneously. The name of the second video will then be:
Video Webcam 5_11_2016 10_54_43 AM 2.mp4
Procedure
Enter a name in the File base name field.
Note
The date and time depend on your computer’s regional settings. To change these, open the Control panel and then Region and Language. Select your preferences in one of the tabs.
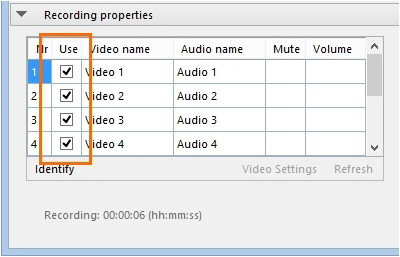
Select or deselect videos for recording
Aim
To choose from which video sources to record video files.
Prerequisite
You selected the recording devices in the Video Settings window.
Procedure
Select or deselect video sources for recording in the Use column.
Record your videos
Aim
To create video files from the video stream of the connected recording devices.
Prerequisites
- Your devices are connected to the computer with MediaRecorder, and, if applicable, switched on.
- MediaRecorder is open.
- You selected the cameras and, optionally, microphones and specified the output of the video files in the Video Settings window (File > Video Settings).
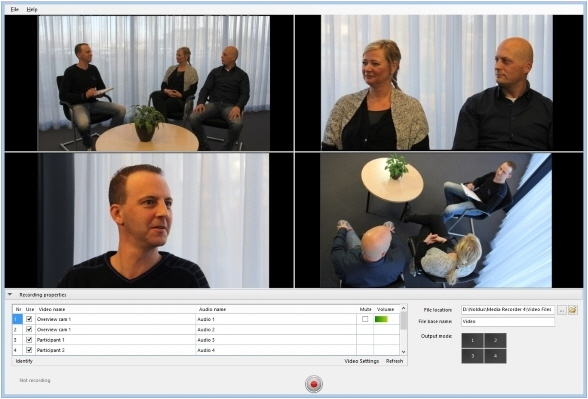
Procedure
- When you selected all settings in the Video Settings window, click OK to return to the Main window. You will see a preview of the cameras.

- Optionally, adjust options like the video file location, the video file base name or the order of the video files. See Options
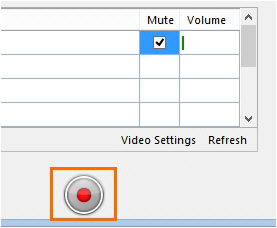
- Press the Start recording button.

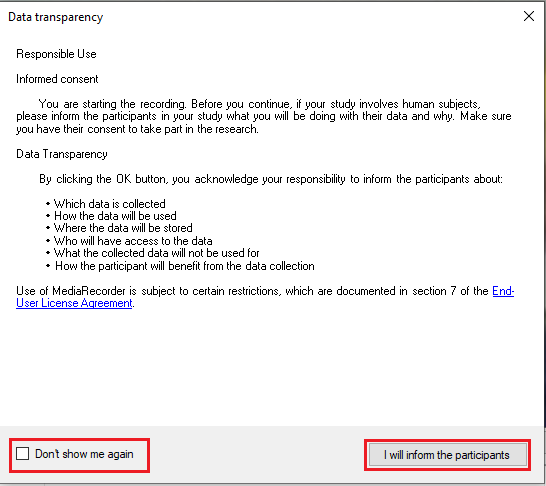
- A pop-up window will appear, informing you about Noldus's Data Transparency Policy. Read it carefully before clicking the I will inform the participants button. You can also check the box Don't show me again to prevent further occurrence.

- The button changes into the Stop Recording button and the Recording timer starts running.
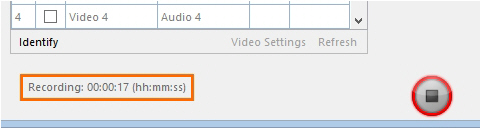
- Press the button again to stop recording. Recording stops automatically when you specified a Maximum recording time.

Note
If you have IP cameras, see Pan, Tilt, Zoom control with IP cameras how to change the camera view before or during recording.
Mute audio in preview
Aim
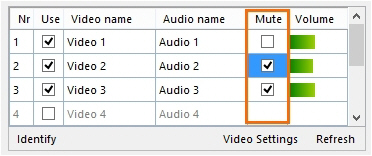
To mute audio sources in MediaRecorder. The muted audio is recorded normally in the video files.
Prerequisite
You selected microphones in the Video Settings window.
Procedure
Select the audio sources you wish to mute in the Mute column.
Options
What do you want to do?
- Change the video file location
- Set video file base name
- Select or deselect videos for recording
- Mute audio in preview
- Change video order in preview
- Show frame rate, resolution and format
- Refresh the preview
- See which preview image comes from which camera
- Show or hide recording properties
- Show frame rate, resolution and format
- Enter a default user name and password of IP cameras
- Pan, Tilt, Zoom control with IP cameras
Change video order in preview
Aim
To change the order of the video cameras, for example to change the position of the images in a Picture in Picture recording.
Prerequisite
You selected the recording devices in the Video Settings window.
Procedure
- Drag and drop rows. in the table with video devices or drag and drop the preview images.
- Click the Refresh button.
See Refresh the preview
Note
You cannot drag and drop Picture in Picture, or Picture by Picture preview images. Drag and drop the rows in the table with video devices instead.
Show frame rate, resolution and format
Aim
Procedure
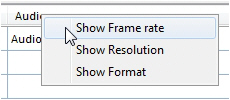
Right-click one of the column headers and select the preferred options.
Notes
- The Format column shows the color space of the video file. The column is hidden by default, because the optimal color space is selected by default. See the following page for more information on color space.
http://www.noldus.com/knowledge-base/what-color-space-format-used-media-recorder.
- TIP Follow the same procedure to show or hide the Frame rate, Resolution, and Format columns in the Video Settings window.
Refresh the preview
Aim
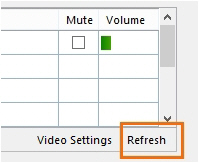
To display video images in the preview after a temporary connection loss or if you connected a camera after you opened MediaRecorder.
Procedure
Click the Refresh button.
See which preview image comes from which camera
Aim
To see which image comes from which camera.
Prerequisite
You selected the recording devices in the Video Settings window.
Procedure
Press the Identify button.
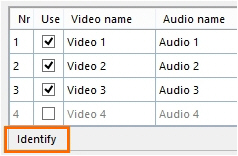
Result — Numbers are superimposed on the camera images. These correspond to the row numbers in the table.
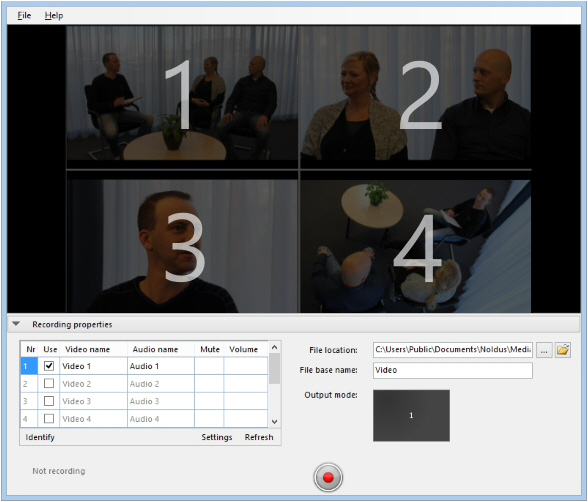
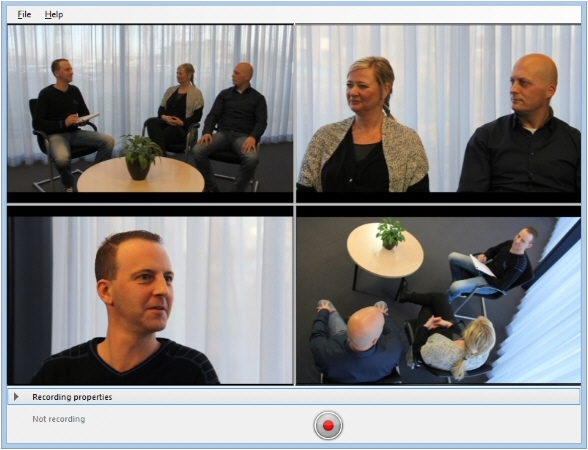
Show or hide recording properties
Aim
To show or hide the table under the preview of the camera images, so that the space for the preview images is increased.
Procedure
Click Recording properties.
Result
The size of preview images is increased.
Save the camera settings
Aim
To make a configuration file that can be used to open the correct cameras, microphones and video settings.
Prerequisites
- Your devices are connected to the computer with MediaRecorder, and, if applicable, switched on.
- MediaRecorder is open.
- You selected camera, microphones and video output in the Video Settings window.
See Select a video device, Select an audio device and Video file options for the procedures.
Background
The settings you create for the different cameras are automatically saved when you close MediaRecorder. They are saved to the file Current settings.mrs that is present in the folder C:\Users\Public\Public Documents\Noldus\MediaRecorder. These settings are used when you restart MediaRecorder. But you can also save your own settings, or save different settings for different setups, for example, a webcam for a test participant’s face in a usability test room and three overview IP cameras in an observation room. This way you do not have to select all cameras manually each time.
Procedure
- Choose File > Save Configuration As.
- Give the configuration a name and click Save.
Notes
- To open a saved configuration, choose File > Open configuration.
- IMPORTANT Never shut down the computer by pressing the power button or cutting off the electricity. Your settings may become lost, even after you saved the settings. Always use the Windows shut down feature to close your computer.
- To go back to the default configuration, choose File > Open Configuration. Browse to the file Default Settings.mrs. This file is read-only. When Noldus installed MediaRecorder for you, the file is in the folder D:\Noldus\MediaRecorder. When you installed MediaRecorder yourself, the file is in the folder C:\Users\Public\Public Documents\Noldus\MediaRecorder, or the folder you selected when you installed MediaRecorder.
- If you encounter problems with starting MediaRecorder, for example because you created wrong settings which are loaded when you start MediaRecorder, delete the file Current settings.mrs. MediaRecorder now starts with the default settings and you can create new settings.
Pan, Tilt, Zoom control with IP cameras
Aim
To change the camera view in MediaRecorder.
- Prerequisites
- Your IP camera supports ONVIF Profile S.
- Your IP camera can Pan, Tilt and Zoom.
- The camera is selected in MediaRecorder.
- See Select a video device
Procedure
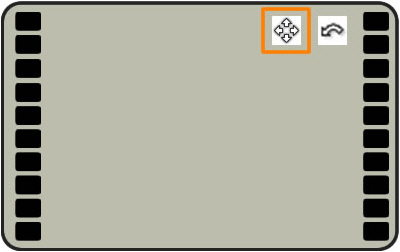
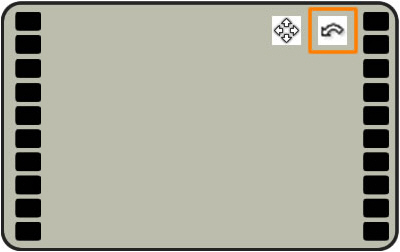
Hover with your mouse over the camera image. Two buttons appear in the top-right corner of your window.
- Enable or disable PTZ control.

- Open the PTZ preset menu.
PTZ control
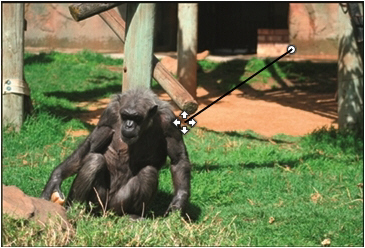
- Click the Enable PTZ button in the image you want to adjust. A four-arrow cross appears in the middle of the image and your mouse pointer becomes a small point.
- Click the camera image and keep your left mouse button pressed to control the camera. The cross now becomes connected to the point and the camera image moves in the direction of the point. The further away from the center cross you click, the faster the camera moves.
- Zoom in and out with your mouse wheel.

Save camera position
If you are satisfied with the position of your camera, you can save this as a PTZ preset. Hover over the camera image and click the button that opens the PTZ menu.
- Save as first PTZ preset.

- Save as second PTZ preset.

- Return to first PTZ preset.

- Return to second PTZ preset


PTZ keyboard shortcuts
The following keyboard shortcuts can be used to control PTZ:
|
Ctrl + 1 |
Enable / disable PTZ in first video |
|
Ctrl + 2 |
Enable / disable PTZ in second video |
|
Ctrl + 3 |
Enable / disable PTZ in third video |
|
Ctrl + 4 |
Enable / disable PTZ in fourth video |
|
Numerical keypad 1 |
Move camera left-down |
|
Numerical keypad 2 |
Move camera down |
|
Numerical keypad 3 |
Move camera right-down |
|
Numerical keypad 4 |
Move camera left |
|
Numerical keypad 6 |
Move camera right |
|
Numerical keypad 7 |
Move camera left-up |
|
Numerical keypad 8 |
Move camera up |
|
Numerical keypad 9 |
Move camera right-up |
|
Numerical keypad + |
Zoom in |
|
Numerical keypad - |
Zoom out |
Notes
- If you use the CH products RS Desktop joystick for PTZ control, make sure it is connected before you start MediaRecorder.
- To reverse the camera pan or tilt direction, open the Advanced Video Settings window and select the checkbox Flip Pan axis or Flip Tilt axis
See step 11 in Select ONVIF cameras in MediaRecorder in Set up IP cameras
To change the PTZ method
MediaRecorder has two PTZ methods. The default method is described above. it is also possible to let the camera center its camera view to the point that you click with your mouse.

Procedure
- Open MediaRecorder and select your IP cameras.
See Select ONVIF cameras in MediaRecorder - Close MediaRecorder. This saves settings for the IP cameras in the file Current Settings.mrs.
- Create a backup of the file Default Settings.mrs that is present in the folder C:\Users\Public\Public Documents\Noldus\MediaRecorder.
- Open the file Current Settings.mrs from the same folder with Notepad.
- Locate the line <PtzType>1</PtzType> and change 1 to 0. There is a line for each PTZ camera that you selected in MediaRecorder. Change the line for each PTZ camera.
Important When you selected the same camera multiple times in MediaRecorder, use the same method for pan and tilt in each camera. So for each camera, use either 1 or 0. - Save the file as Default Settings.mrs. These settings are used when the file Current Settings.mrs is not found.
- Delete the file Current Settings.mrs from the folder C:\Users\Public\Public Documents\Noldus\MediaRecorder.
- Re-open MediaRecorder. MediaRecorder opens with configuration file Default Settings.mrs and creates a new file Current Settings.mrs with the edited settings. The new PTZ method is now available.
To Pan and Tilt the camera view
- Click the Enable PTZ button in the image you want to adjust.
- A white cross appears. The camera moves to the point that you click with your mouse.
Enter a default user name and password of IP cameras
Aim
To enter the ONVIF user name and ONVIF password of IP cameras only once, in case you have several cameras with the same credentials.
Procedure
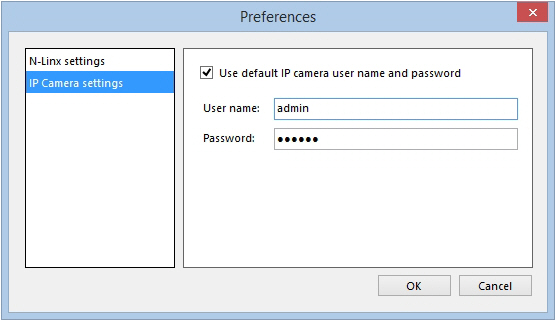
- Choose File > Preferences > IP camera settings.
- Select Use default IP camera user name and password.
- Enter the user name and password.

- Follow the procedure in Select ONVIF cameras in MEdiaRecorder or Select devices that do not support ONVIF in MediaRecorder. When you click the Advanced video settings button, the user name and password are filled in automatically.
Use commands
Aim
To control video recording with another program that can send commands, for example, EthoVision XT.
- Prerequisites
- Your devices are connected to the computer with MediaRecorder, and, if applicable, switched on.
- You selected cameras, microphones and video output in the Video Settings window of MediaRecorder.
See:
Select a video device
Select an audio device
Video file options
Procedure
In your application, browse to the program MRCmd.exe that is by default located in the folder C:\Program Files\Noldus\MediaRecorder 6 and specify the command.
For example, use the following command line to start video recording:
“C:\Program Files\Noldus\MediaRecorder 6\MRCmd.exe /R”
note If you installed MediaRecorder in another folder than the default one, the program MRCmd.exe is present in this folder. Adjust your command lines accordingly.
Available commands
- Start MediaRecorder – MRCmd.exe or MRCmd.exe /E
- Start recording — MRCmd.exe /R
- Stop recording —MRCmd.exe /S
- Close MediaRecorder — MRCmd.exe /X — Closes MediaRecorder program.
- Load a configuration file — MRCmd.exe /C=[filename.mrs].See Load a configuration file
- Set the file base name — MRCmd.exe /B=[basename]. See Set file base name
There is a space between MRCmd.exe and the slash.
Load a configuration file
The command /C loads a configuration file with the settings for your cameras (Save the camera settings). This is, for example, useful to open MediaRecorder with the correct cameras. Make sure MediaRecorder is not recording at that moment.
By default MRCmd.exe loads a file from the folder C:\Users\Public\Public Documents\Noldus\MediaRecorder. If the file is located in another folder, you must type the full path. If the file name or the path contains spaces you must type it in between quotation marks.
Example 1 - Open MediaRecorder and load Configuration_observation_room.mrs from C:\Users\Public\Public Documents\Noldus\MediaRecorder:
MRCmd.exe /E /C=Configuration_observation_room.mrs
Example 2 - Opening MediaRecorder and load Configuration Control Room from C:\Configuration files:
MRCmd.exe /E /C=”C:\Configuration files\Configuration Control Room.mrs”
Set file base name
The command /B sets the File base name.
Example - Set the File base name to Observation room:
MRCmd.exe /B=”Observation room”
This option cannot be used together with other commands.
Notes
Delay
Allow enough time between the commands. If a command is sent before the previous one is carried out, the second command is not carried out. For example, if the command Start Recording is sent before MediaRecorder is completely open, recording does not start.
There may be a delay between the command Start Recording and the moment the recording actually starts. This delay depends on the number of cameras, camera settings, the processor speed and programs running in the background.
In the most common scenarios with MediaRecorder and The Observer XT, the videos are automatically synchronized with the events, so the delay is not important.
See also Synchronize videos with events in MediaRecorder with The Observer XT
Picture by Picture resolution
The highest allowed resolution of a recorded video is 1920 x 1280. The resolution of a Picture by Picture video is a sum of the separate videos. However, if that exceeds a width of 1920 pixels or a height of 1280 pixels, the video resolution is adjusted proportionally. This requires processor capacity and decreases the quality of the output video. It is better to choose a lower resolution of the individual videos, so that the total resolution does not exceed 1920 x 1280.
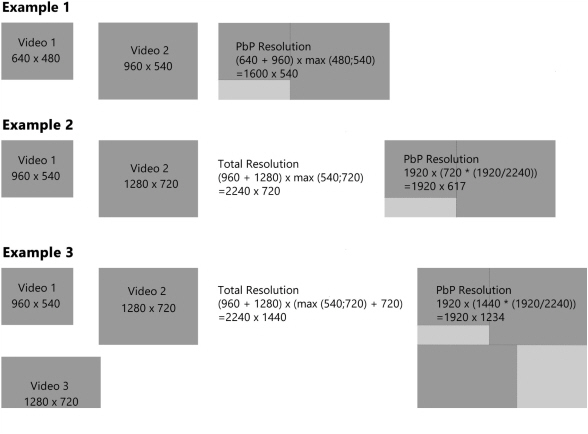
The resolution of the picture by picture video is determined in the following way:
- Example 1 — The width of the PbP video is the sum of the width of the separate videos. The height of the PbP video is the maximum height of the separate videos.
- Example 2 — The total resolution is calculated in the same way as in Example 1. The width of the resulting video exceeds the maximum of 1920 pixels. Therefore both the width and height are reduced proportionally, resulting in a width of 1920 pixels.
- Example 3 — The total width is the sum of the width Video 1 and 2. The height of of the resulting video is the maximum height of Video 1 and 2 plus the height of Video 3. Both the width and height of the resulting video will exceed the maximum of 1920 x 1280. Therefore both the width and height are reduced proportionally, resulting in a width of 1920 pixels. The height is now smaller than the maximum of 1280 pixels.
If the height was higher than 1280, the width and height would be reduced further, resulting in a height of 1280 pixels.