# Create camera settings
## Aim
To configure the camera for optimal recording with MediaRecorder.
## Prerequisites
- You have Axis IP cameras that are supported with MediaRecorder.
See [Supported IP cameras](https://bookstack.noldus.com/link/412#bkmrk-supported-ip-cameras) in [Recording devices](https://bookstack.noldus.com/link/410#bkmrk-page-title)
- You installed the Ethernet card.
See [Install the Ethernet card](https://bookstack.noldus.com/link/478#bkmrk-page-title)
- You gave the card a fixed IP address.
See [Set Ethernet card IP address](https://bookstack.noldus.com/link/480#bkmrk-page-title)
- You connected all cameras.
- You gave the cameras an IP address.
See [Set camera IP address](https://bookstack.noldus.com/link/483#bkmrk-page-title)
- You gave the camera a password and selected the correct power line frequency.
See [Set camera password and select power line frequency](https://bookstack.noldus.com/link/484#bkmrk-page-title)
## Procedure
Carry out the following steps:
1. [Access camera settings](https://bookstack.noldus.com/link/485#bkmrk-access-camera-settin-1)
2. [Create ONVIF User name and Password](https://bookstack.noldus.com/link/485#bkmrk-create-onvif-user-na)
3. [Disable replay attack protection](https://bookstack.noldus.com/link/485#bkmrk-disable-replay-attac)
4. [Switch on IR cut filter](https://bookstack.noldus.com/link/485#bkmrk-switch-on-ir-cut-fil)
## Note
The procedure below describes the camera firmware version 7.20.1. For other firmware versions, search for comparable settings.
## Access camera settings
1. Open the camera in a browser by clicking the **Home page** button in the IPUtility tool or typing the IP address in the address field of an Internet browser. Then enter the password.
2. Click the **Settings** button in the bottom-right corner of your window.
[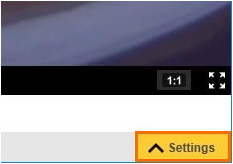](https://bookstack.noldus.com/uploads/images/gallery/2023-12/rEV3M2E6FhHChUAn-image.png)
## Create ONVIF User name and Password
### Aim
To configure the camera so that pan, tilt, zoom, and audio recording is possible.
### Procedure
1. Open the camera settings.
1. See [Access camera settings](https://bookstack.noldus.com/link/485#bkmrk-access-camera-settin-1)
2. Open the **System** tab and click **ONVIF**. [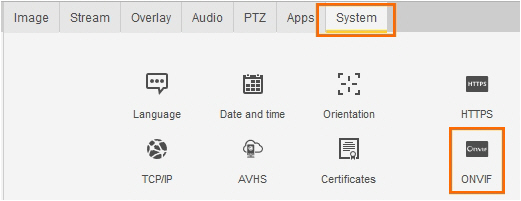](https://bookstack.noldus.com/uploads/images/gallery/2023-12/0STTUMjiqBpSHIR1-image.png)
3. Click **Add** and enter the same **User name** and **Password** as set in [Set camera password and select power line frequency](https://bookstack.noldus.com/link/484#bkmrk-page-title). Do not use the characters @, space, or colon (:) for the user name or password. These characters cannot be used in MediaRecorder.
4. Select **Administrator** as **User Group** and click **OK**. [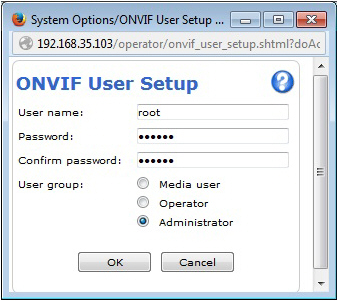](https://bookstack.noldus.com/uploads/images/gallery/2023-12/5RySJiwCMPc0Bwht-image.png)
#### Notes
- If the camera does not support ONVIF, pan, tilt, and zoom must be done with a browser and audio of the camera cannot be recorded. All IP cameras supported with MediaRecorder support ONVIF.
- **IMPORTANT** Always close the browser before you start recording with MediaRecorder.
## Disable replay attack protection
### Aim
To prevent that connection to the camera fails if the time of the MediaRecorder computer differs from the time in the camera.
### Background
Replay attack protection is a camera security setting. Relevant for video recording with MediaRecorder is that replay attack protection causes the camera connection to fail if the timestamps of MediaRecorder and the camera are not exactly the same. Replay attack protection is necessary for security cameras, but not for IP cameras in a dedicated network.
## Procedure
1. Open the camera settings.
See [Access camera settings](https://bookstack.noldus.com/link/485#bkmrk-access-camera-settin-1)
2. Open the **System** tab and click **Plain config**.
3. From the list at the bottom, select **WebService** and click **Select Group**.
4. Under **WebService UsernameToken**:, make sure the checkbox **Enable replay attack protection** is not selected.
[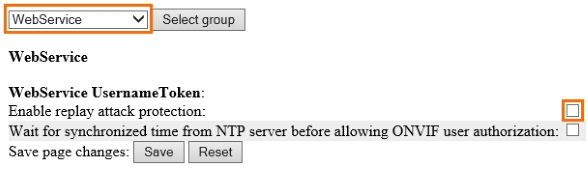](https://bookstack.noldus.com/uploads/images/gallery/2023-12/iRJnkJqEXFR3RLk5-image.png)
#### Note
If you do not want to disable this option, make sure that the clock times of the computer and camera are exactly the same.
## Switch on IR cut filter
### Aim
To make sure the cameras does not switch to black and white at low light levels.
### Background
The IR cut filter removes infrared light during daylight. With the default camera settings, the IR cut filter is switched off at low light intensities. The camera then records in near-infrared, which gives a black and white camera image. If you do not want this, set the IR cut filter to On instead of Auto, so that it stays on, independent of the light level.
### Procedure
1. Open the camera settings.
1. See [Access camera settings](https://bookstack.noldus.com/link/485#bkmrk-access-camera-settin-1)
2. Open the **Image** tab.
3. Check if there is an option **IR cut filter**. If so, set it to **On**.
[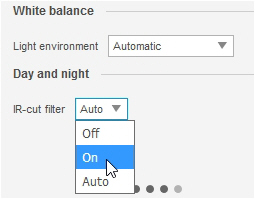](https://bookstack.noldus.com/uploads/images/gallery/2023-12/MQ52b4CKHS6VeGTa-image.png)
### Note
Not all IP cameras supported with MediaRecorder have an IR cut filter.