Set up the Epiphan Pearl Nano screen capture device
Prerequisites
,
- The network allows data transfer of at least 1 Gb per second.
- We recommend to use a dedicated network for the cameras.
- The cables must be suitable for Gigabit Ethernet. The minimum cable quality is CAT5e
https://en.wikipedia.org/wiki/Category_5_cable
Which situation applies to you?
You bought your computer, broadcaster and MediaRecorder from Noldus IT.The broadcaster and computer have been set up. Also MediaRecorder has been set up to use with the broadcaster. You can connect the device and start recording.SeeRecord video
You bought the broadcaster from Noldus IT and installed MediaRecorder on your own computerThe IP address of the broadcaster has been set and the frame rate has been limited.Carry out theProcedurebelow, but skip steps4-6.
You bought the computer and broadcaster somewhere else.Carry out the entireProcedurebelow.
Procedure
Install the Ethernet card. This is the same procedure as for IP cameras.SeeInstall the Ethernet cardinSet up IP camerasGive the Ethernet card a fixed IP address. This is the same procedure as for IP cameras.SeeSet Ethernet card IP addressinSet up IP camerasInstall MediaRecorder with its prerequisites.
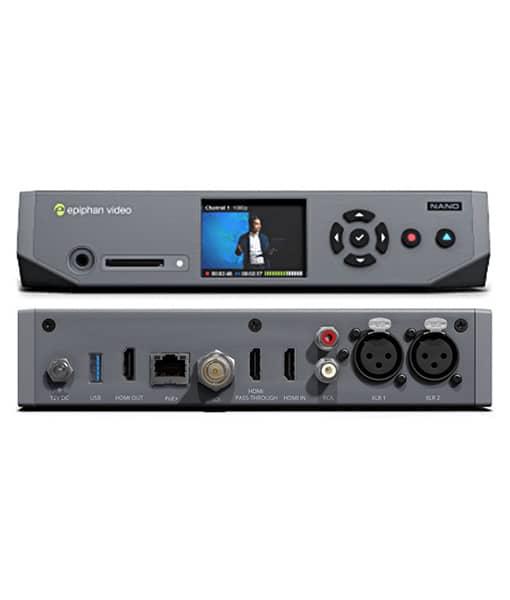
See InstallationSetUsing a HDMI cable, connect thecomputer’soutput of the video source to the HDMI IN port on the back panel of the Epiphan Pearl Nano device.
- Using a HDMI cable, connect the control monitor to the HDMI PASS THROUGH port on the back panel of the Epiphan Pearl Nano device.

- Use the control keys on the front panel to configure the system parameters.

- Using the right arrow key, navigate to System Status.
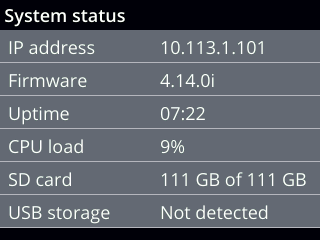
- Here, you can get the network IP address
toof your device and you can also check the firmware version. It is recommended to use the latest firmware version. If you need an update, register you device at Epiphan (https://www.epiphan.com/support/product-registration/) - Using the left arrow key, navigate to Menu. Within Menu, navigate to System > Network.
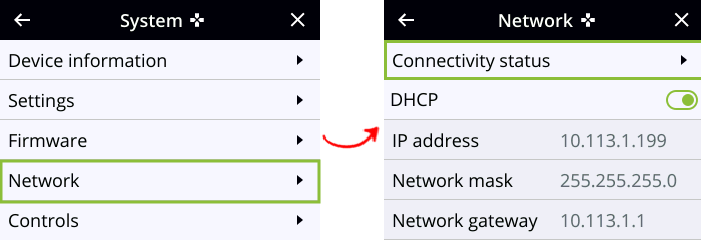
- Disable DHCP. Set IP address manually. Define an IP address range similar to that of the
broadcasterother cameras. SetByBroadcasterdefault, do not change Network mask and Network gateway settings. If uncertain, consult your system administrator.- Open your internet browser. Use the IP address
andoflimityourframeEpiphanratePearl Nano device to access the Pearl Admin panel. For this, include /admin to access the Admin panel.
ResetUsing thecomputerPearlIPAdminaddresspanel, configure video encoding. Go to Channel(s), select your channel and click Encoding. In Video settings, make sure Current signal resolution is used as frame size (have the checkbox checked).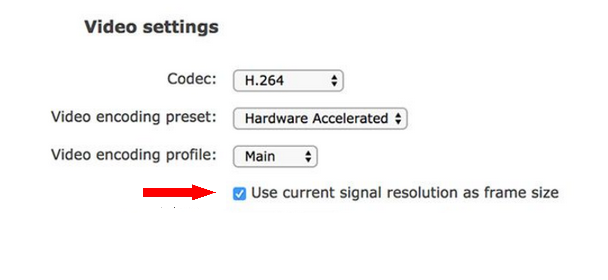
ConnectSet Key frame interval to 1/2 sec. At Limit frame rate, it is not recommended to change thebroadcasterdefaulttovalue 30. If you use a higher frame rate, it might jeopardize your recording operation. Please do not change thecomputerdefaultwithBitrateMediaRecorder.valueThis(auto).is the same procedure as for IP cameras.SeeConnect IP cameras to the PC- Open MediaRecorder and choose File > Video settings or click Video settings.
- In Video Settings, select the option RTSP IP Camera (Noldus RTSP Source Filter). Please note that the Epiphan Pearl Nano device is NOT an ONVIF device! For the details, see Select
thedevicesVGADVIthatbroadcasterdo not support ONVIF in MediaRecorder. - Please note that you cannot use the Epiphan Pearl Nano device to make audio recordings! Use another audio device for the purpose. For the details, see Select an audio device.
