Annotate
Aim
To score markers during session recording, or afterwards while playing the recorded session back.
Prerequisites
- Your license includes the Annotation Module.
- To annotate during session recording, your user role allows recording (Technician, Administrator, or Trainer).
- To annotate a session while playing it back, you recorded the session, received session ownership or have been assigned as the annotator.
To annotate during session recording
- Open a location.
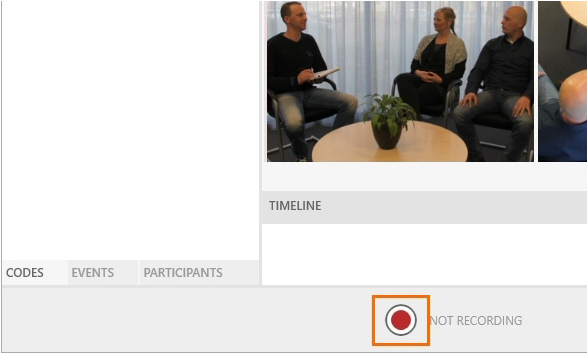
If you selected multiple locations, use the carousel control to open the location. See To open locations with the carousel control. - Click on Codes in the lower-left corner of your screen to open the Codes tab.
- Click this button and select the correct list. This is possible until you score the first Subject or Marker.
- Optionally pan, tilt, or zoom the cameras and select which microphones to hear in the preview.
See Select locations for recording - Start recording.
- Annotate by clicking the subjects (optional) and markers in the Codes window or by pressing the associated keys on the keyboard.
If you defined subjects, score the subject first and then the marker. As soon as the subject is scored, the Markers tab in the Codes window opens so you can score the marker. The moment the subject is scored is recorded as timestamp.
To score markers without a subject, open the Markers tab manually in the Codes window, or press Ctrl + /. Then score the marker.
If you did not define subjects, score the markers either in the Codes window, or with the keys on your keyboard.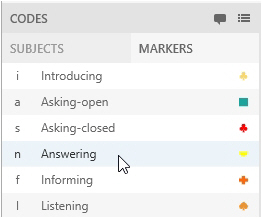
See also Annotations in a multiple-location recording
To add codes during session recording
IMPORTANT The added subjects and markers are saved for the present session only. They are not stored in the Codes list for future sessions.
If you have a multi-location recording and selected Separate sessions, the codes are stored for the session that is open on your screen only.
Procedure
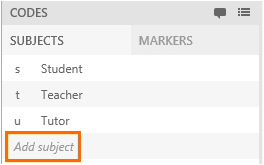
- Subject - open the Subjects tab and click Add Subject. Enter a name and accept the default keycode or choose another one.
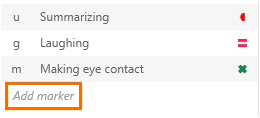
- Marker - open the Markers tab and choose Add Marker. Enter a name and accept the default keycode and symbol or choose other ones.
How annotations appear
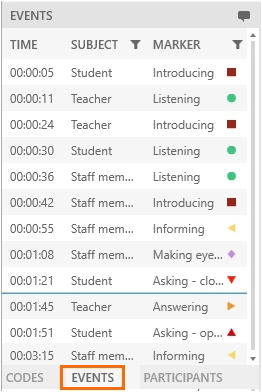
The scored annotations appear in the Event log and the Timeline.
Event log
To view the Event log, open the Events pane at the bottom-left side of your window.
Timeline
In the Timeline, the events are plotted against time. Subjects are listed vertically. The markers are displayed horizontally on the Timeline. During session recording, the subjects are shown in the order they were scored, the last subject scored is shown at the top. While reviewing, the subjects are shown in the same order as in the Codes list.
If markers were scored without subject, the markers are displayed in the row No Subject in the Timeline. Remarks are also displayed in the No Subject row.
To annotate after session recording:
- 1.Open a recorded session (see Review sessions) and play it. This locks the session for other users, who can now only view the session and cannot score markers.
If you have a multiple-location recording, use the carousel control to open the location you want. See To open locations with the carousel control.
- Click on Codes in the lower-left corner of your screen to open the Codes tab.
-
If you did not select a Codes list during session recording, click this button to select one. Also use this button to change the codes list. This is possible until you score the first marker.

-
Annotate, following the same procedure as in Annotate.
During session playback you can only score subjects and markers from the same list that you used during session recording. However you can add subjects and markers for this session. See To add codes during session recording -
To save changes before you exit the session, press Ctrl +S. The markers are also saved if you exit the session.
Notes
- You can select codes lists created by others, but you can only annotate your own sessions, the sessions for which you received ownership or annotator rights.
- Others cannot view scored markers and remarks when you are recording and annotating a session.
- Others can view the scored markers and remarks when a recorded session is edited. To do so, open the Sessions tab and open the session. The markers and remarks appear when the person that edits the session saves it (Ctrl + S).
Annotations in a multiple-location recording
If you selected multiple locations, it depends on whether you Select multiple locations to record separate sessions for each location or Select multiple locations to record a composite session how annotations are stored. Annotations are linked to the sessions, not to the location. See below for the difference.
Separate sessions
Each session has its own annotations. This means that you can annotate the separate sessions differently. The annotations are stored for the location you have open on your screen while you are annotating. Codes you add during session recording will be added to codes list of the session that is open on your screen only.
Composite session
The composite session will have one Event log. The Event log for the different locations is the same, independent from which location is open on your screen. You can open another location and continue with the same Event log. All annotations are stored in the same Event log. Codes you add during session recording are added to the codes list of all locations.
If the user that records a composite session switches locations, a Remark is added to the Event log with the Location name. The Remark has the timestamp the new location has opened.
If you do not have the Annotation Module, no Remark is added when you change locations during recording.

