Select multiple locations to record separate sessions for each location
aim
To select multiple locations for simultaneous session recording. Each location results in a separate session.
Prerequisites
- The setup account enabled multiple-location recording.
- Your user role allows session recording (Technician, Administrator, or Trainer).
procedure
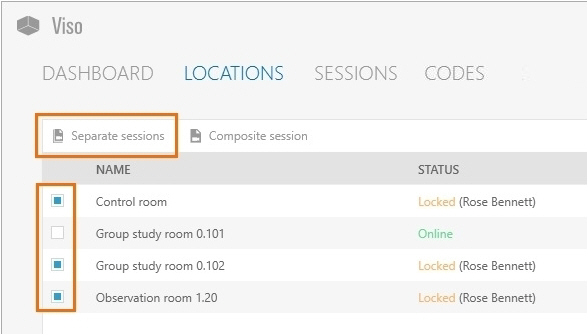
- In the Locations tab, select the locations.
- Click the Separate sessions button on the toolbar.
-
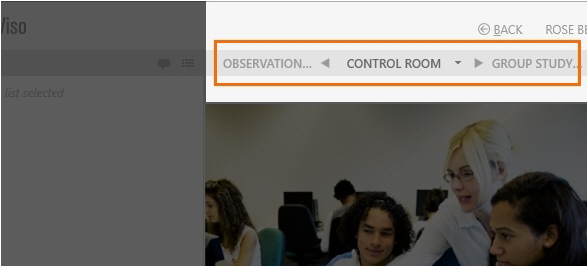
A preview of the cameras in the location that you selected first appears. The toolbar displays the carousel control.
The carousel control
The location you selected first is displayed in the middle of the carousel control.
The location displayed on the right is the location you selected second.
The location displayed on the left is the location you selected last.
To open locations with the carousel control
Do one of the following:
- Press the carousel control buttons to browse through the locations.
- Press the Page up and Page down button on your keyboard.
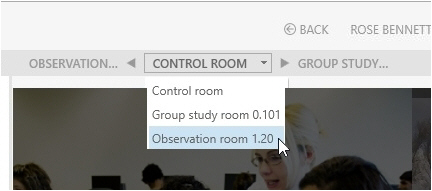
- Click the down arrow next to the location in the middle and select another location from the list.
To set up the locations
See the third chapter of this Reference (Prepare session recording) for the procedure. Follow the procedure for each location.
NOTE If you selected only two locations, the second is displayed on the left as well as on the right in the carousel control.
NOTE The Separate Sessions button is enabled once you selected multiple locations. Separate session recording is supported with a maximum number of eight locations with two cameras each.


