Highlight videos
aim
To select specific point events of interest within sessions and create highlight videos containing these, optionally with subtitles, for further use.
prerequisites
Your license includes the Annotation Module.
The session has been recorded and you received ownership rights for the session.
procedure
- Open the Sessions tab.
- Double-click a session to open it.
- Right-click anywhere in the Timeline or click on the Export highlight video button in the top right corner of the Timeline.

- In the Highlight video window, you have two options to select the point event(s) of the session you wish to include in your highlight video. For a single event, move the Time slider to or near to the particular point event of interest and select For current time point. Continue with Step 7.

If the point events of interest are associated with some or all of the markers you have specified in the Code list you used to annotate your session (see Create Code Lists and Annotate) select For multiple markers. Continue with Step 5.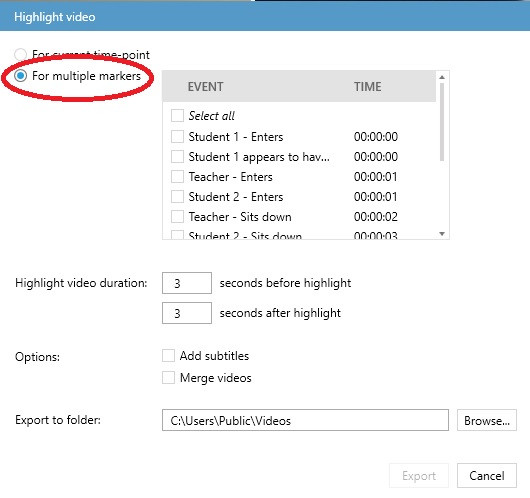
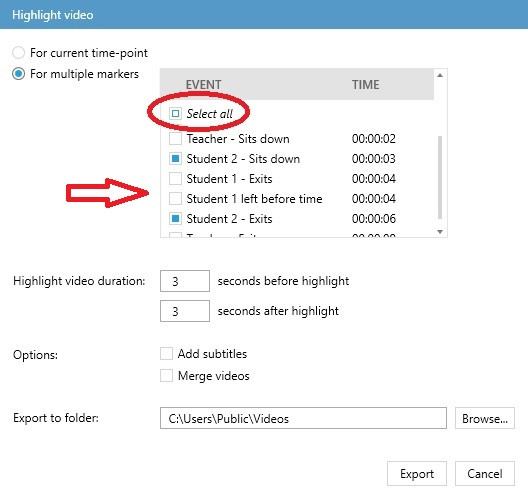
- If you have opted for For multiple markers, a window appears where you can select the point events you wish to highlight. You may select as many of these as you wish by checking the relevant boxes, or select them all using the Select all checkbox.
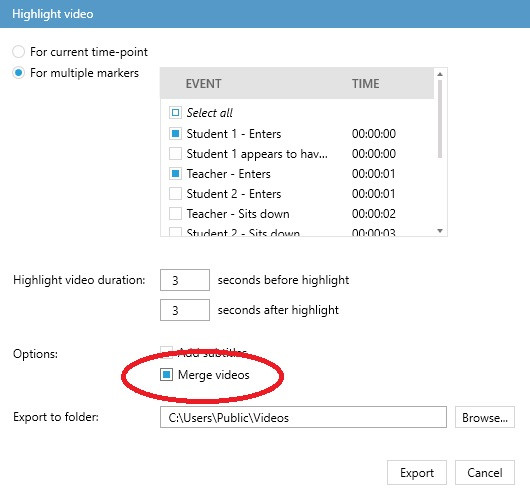
- If you wish to merge all your highlighted point events into a single video, use the Merge videos option.
- Use the Highlight video duration option to set the length of the section including the selected point event. By default, 3 seconds will be added before and after the highlighted point event, but you may adjust this value up to 30 seconds before and 30 seconds after the selected event. If you select an invalid duration, the box will be marked in red and you will not be offered the Export option.
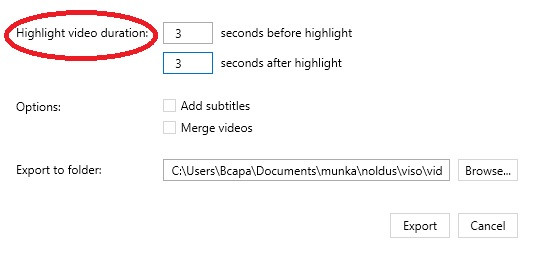
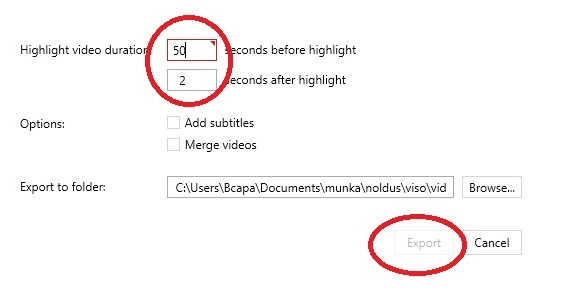
NOTE The Highlight video duration set by you will also include the previously set Pre-roll value. (See Review sessions.)
NOTE If the Highlight video duration set by you exceeds the length of the session, the resulting Highlight video will include the highlighted event more than once, so it is recommended to set the duration shorter than the lenghth of the session.
8. If you wish to add subtitles, check the Add subtitles box at Options. 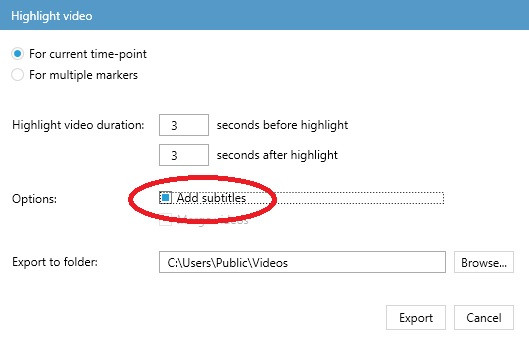 The Subtitles will comprise of the names of the highlighted Events and Subjects involved (see Create Code Lists) as well as any Remark you might have added (see Enter a remark).
IMPORTANT Your subtitles will be saved in a separate vtt file so that you can edit them later if you wish. When reviewing your Highlight video, you will need to select the relevant vtt file and turn on the subtitles. For the details, see Adding subtitles to your hightlight videos.
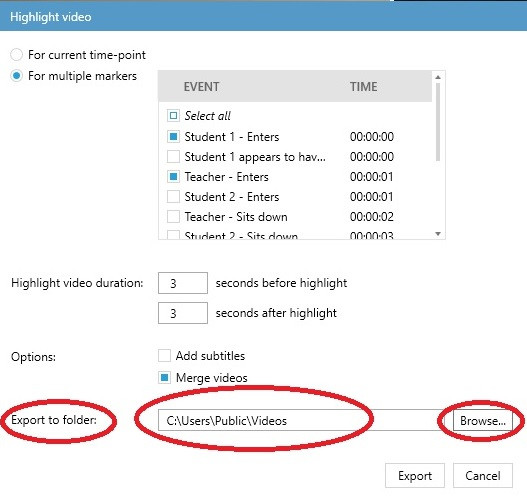
9. At Export to folder, select the folder where you wish to save your Highlight video. Viso offers you a default option, but you are also free to Browse.
NOTE If more than one cameras were used for recording the original session, a separate highlight video will be created for each, with the same subtitles.
NOTE Viso will create a unique default name for the highlight video for exporting which you cannot change. If you have created subtitles, the vtt file containing these will be given the same unique default name.
10. Once you have made all the necessary settings, press the Export button.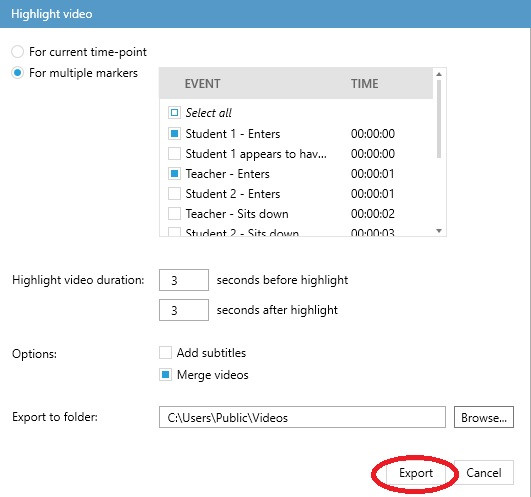
NOTE If you wish to rename the exported highlight video file, you will need to do it later, in the folder. When doing so, it is recommended to give the highlight videos and the related vtt files with the subtiles (if you created any) the same name to facilitate the easy adding of subtitles when reviewing the videos later on.
Adding subtitles to your highlight videos
As mentioned above, your highlight videos and the related subtitles will be saved in separate files. When you wish to see the subtitles while reviewing your highlight video, you will need to select the relevant vtt file containing the subtitles and enable the subtitles function.
procedure
- Open your highlight video e.g. in Windows Media Player or PowerPoint.
- Look for the icon where you can set the languages and subtitles for your video.

- You will be offered a choice of selecting the subtitles from file. Select the relevant vtt file and click Open. Now the subtitles you created will be displayed under your video.
NOTE If you wish to edit your subtitles, you can do it by opening the vtt file in a text editor and make the desired changes.
IMPORTANT When you copy your highlight videos to a different folder, please remember to copy the related vtt files together with them.
No Comments